How to Make Sausages Using A Stan Mixer
There’s something deeply satisfying about making your own sausages. You control the ingredients, the texture, and the flavor; no mystery fillers or excess salt. With a stand mixer and the right attachments, the process becomes surprisingly manageable.
Homemade sausage doesn’t require a butcher’s setup or years of practice. A KitchenAid mixer with a grinder and stuffer attachment can handle most of the work. Once you get the hang of balancing meat, fat, and seasoning, it becomes a weekend ritual worth repeating.
Before you start, it’s important to understand the steps clearly: grinding, mixing, stuffing, and storing. Each stage has its tricks, and mastering them makes all the difference between a crumbly link and a juicy, perfectly textured sausage.
Choosing the Right Tools and Ingredients

The first step in sausage making is gathering what you need. A stand mixer does the heavy lifting, but the attachments and your choice of meat will decide how smooth the process runs.
Good sausage begins with good meat. Pork shoulder is the classic starting point; it has the right balance of fat and muscle. For flavor variety, you can mix in beef, chicken, or even game meat.
Grinder and Stuffer Attachments
Using the KitchenAid food grinder and sausage stuffer attachments streamlines the process. The grinder ensures even texture while the stuffer helps you fill casings cleanly without air pockets. Keep all parts cold before use; this prevents smearing and keeps the fat firm for a better final texture.
Seasoning and Fat Ratio
A good sausage usually has 25 to 30 percent fat. It’s what gives it moisture and flavor. Seasonings can be as simple as salt and pepper or as complex as garlic, herbs, and smoked paprika. Mix gently; overworking the meat can make sausages dense instead of tender.
Grinding, Mixing, and Stuffing

This is where your stand mixer truly earns its place on the counter. The grinding and mixing stages decide the texture, while stuffing sets the final shape and bite.
When you grind, aim for a balance between coarse and fine texture. Grinding twice can help, especially if your recipe calls for a smoother sausage. Always keep the meat chilled to avoid melting fat during the process.
Grinding the Meat
Cut the meat and fat into small chunks and partially freeze them before grinding. Use the coarse plate for rustic sausages or the fine one for breakfast links. Don’t rush the process; steady grinding keeps the texture consistent and reduces smearing.
Mixing for Texture
Transfer the ground meat into your stand mixer bowl and use the paddle attachment on low speed. Add your seasoning blend and mix until the meat becomes tacky; this means the proteins have bonded, and the sausage will hold together properly once cooked.
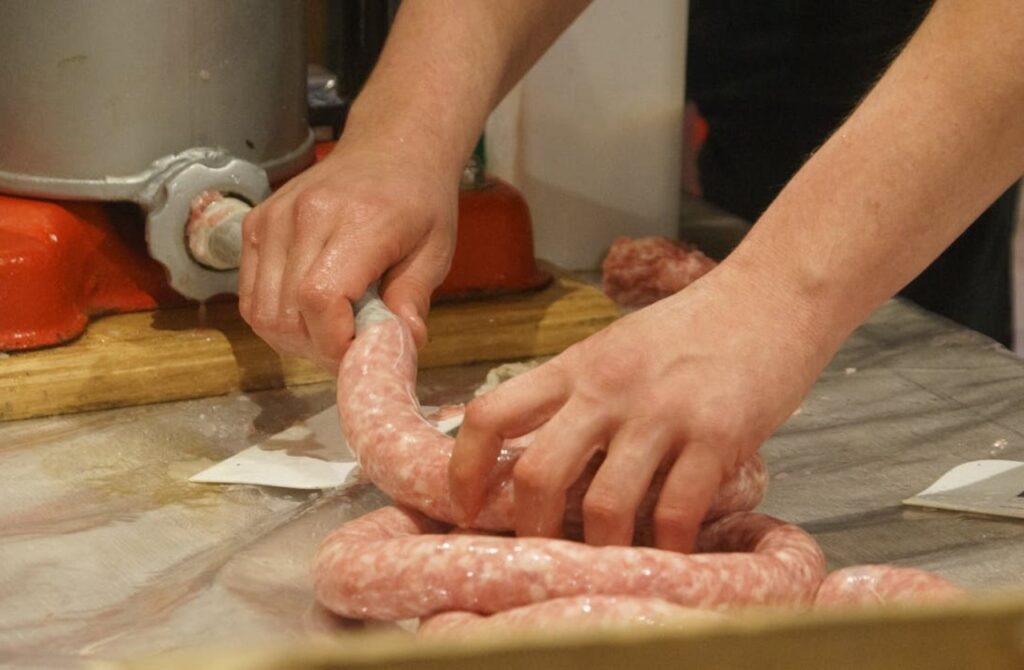
Stuffing the Sausages
Attach the stuffer, slide on a casing, and feed the mixture slowly. Twist into links at your desired length, and prick any air bubbles with a pin. Chill the sausages before cooking or freezing; this helps the flavors meld and the texture set.
Cooking, Storing, and Safety
Now that your sausages are shaped and seasoned, it’s time to cook them safely. Proper temperature control and storage will make all the effort worth it.
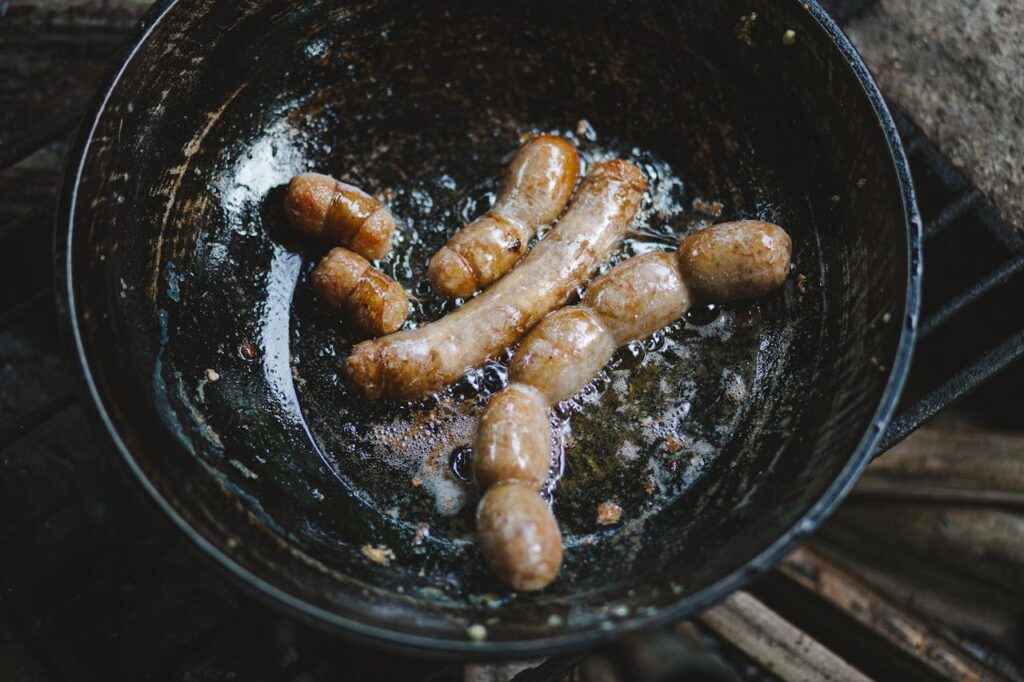
Cooking Options
You can grill, bake, or pan-fry homemade sausages depending on their type. Fresh sausages need to reach an internal temperature of 160°F (71°C). Avoid high heat early on, slow cooking helps prevent bursting and keeps juices inside.
Storage Tips
Uncooked sausages can be stored in the fridge for two days or frozen for up to three months. If you plan to freeze them, separate them with parchment paper to prevent sticking. Always thaw in the refrigerator, not at room temperature, to maintain texture and safety.
The Reward of Doing It Yourself
Making sausage with a stand mixer isn’t just a kitchen experiment; it’s a craft. Once you master the basics of grinding, seasoning, and stuffing, you’ll find endless ways to personalize your recipes. From spicy Italian links to maple breakfast patties, each batch teaches you something new about flavor and texture. Start small, keep everything cold, and trust your taste buds.